Table of Contents
Micro Ladd Technology Z-Drive Installation Procedure
You will need
- 1.5, 2, 3mm Hex Wrench
- Needle Nose Pliers
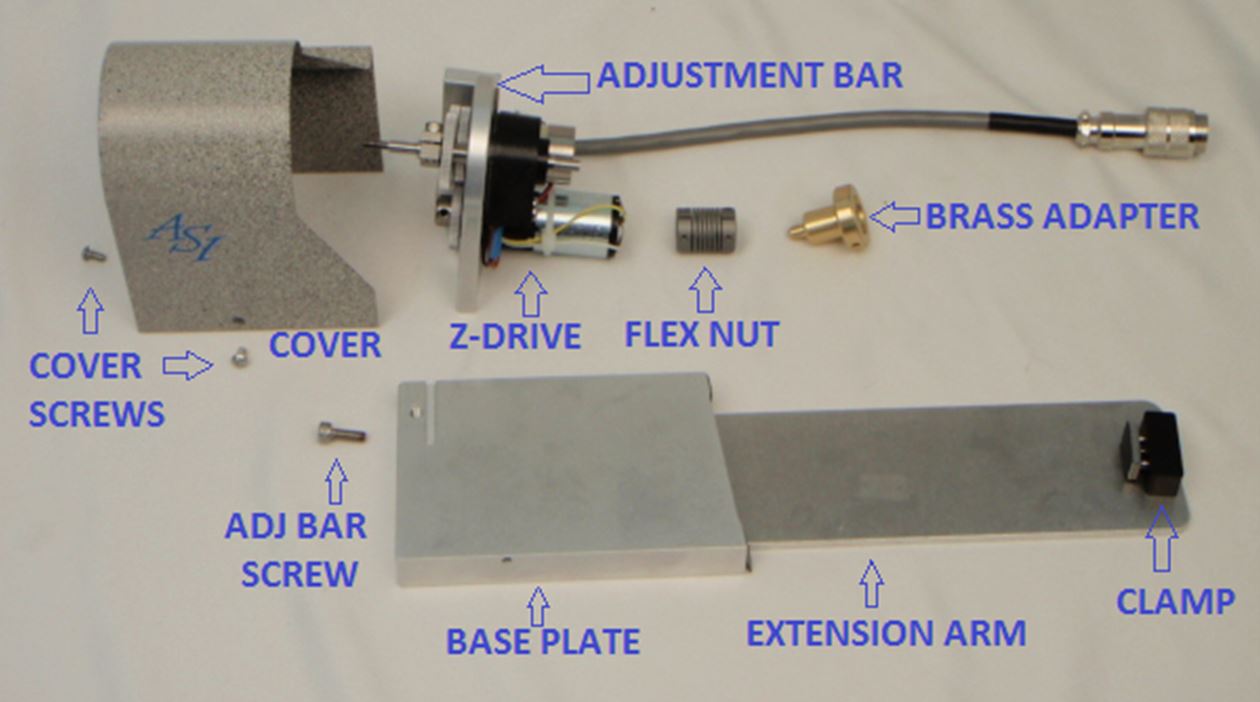
Install Brass Adapter
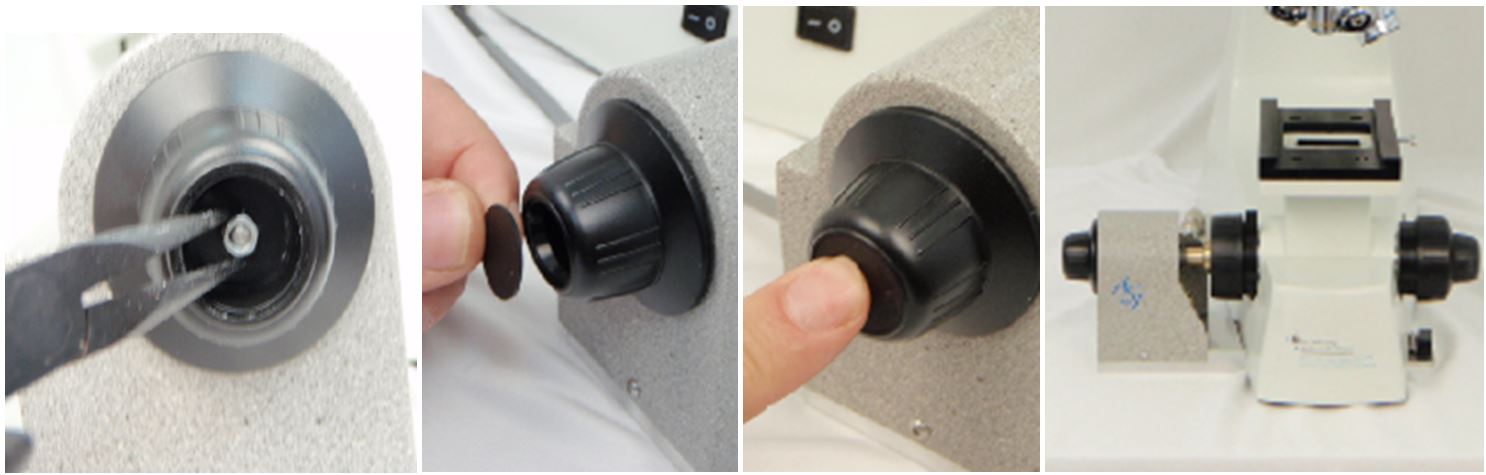
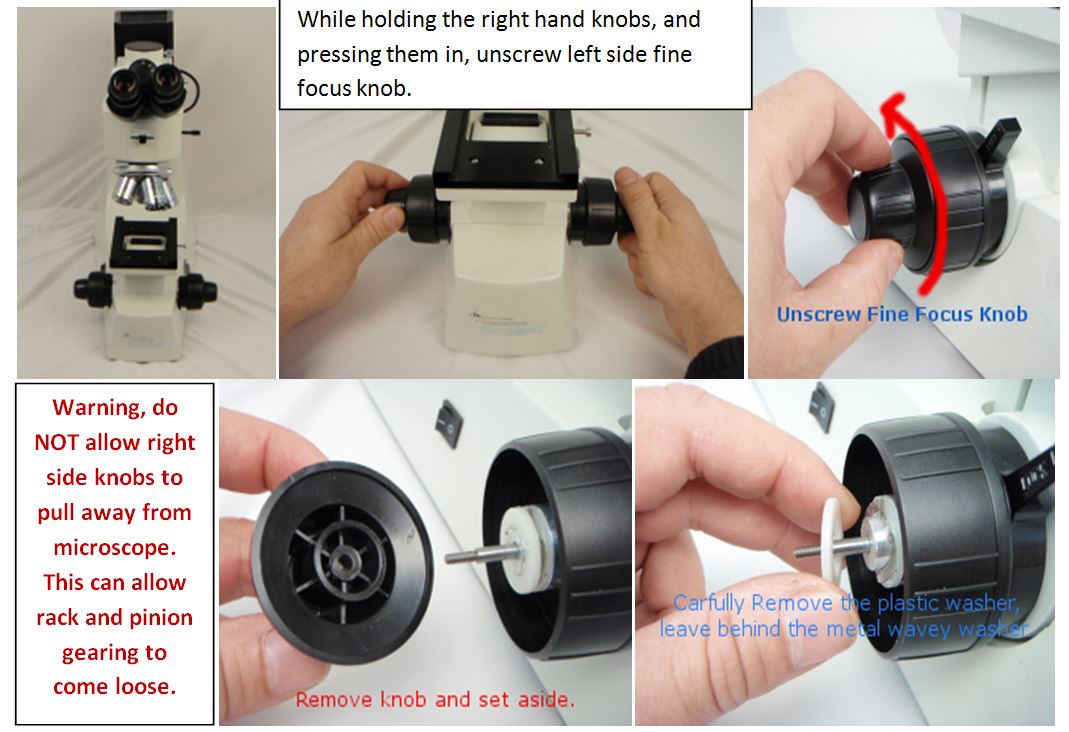
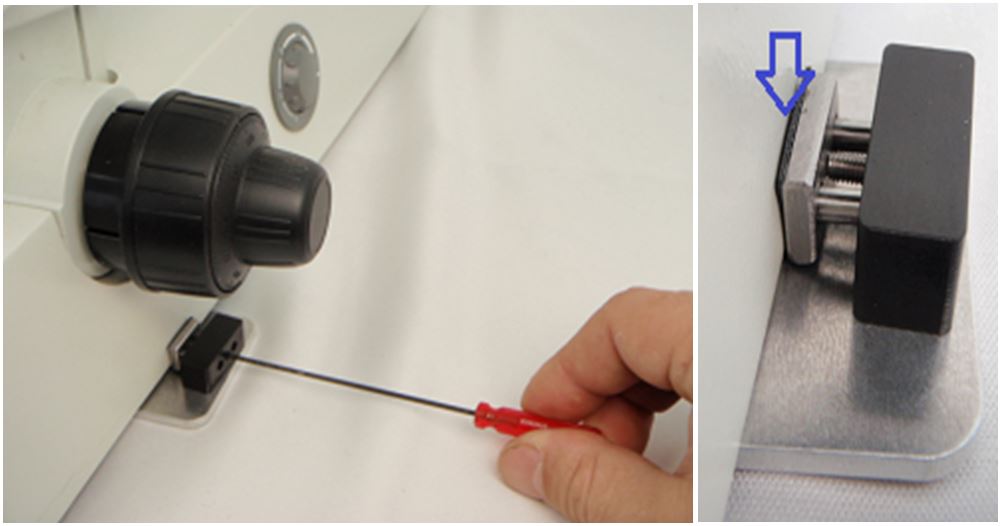
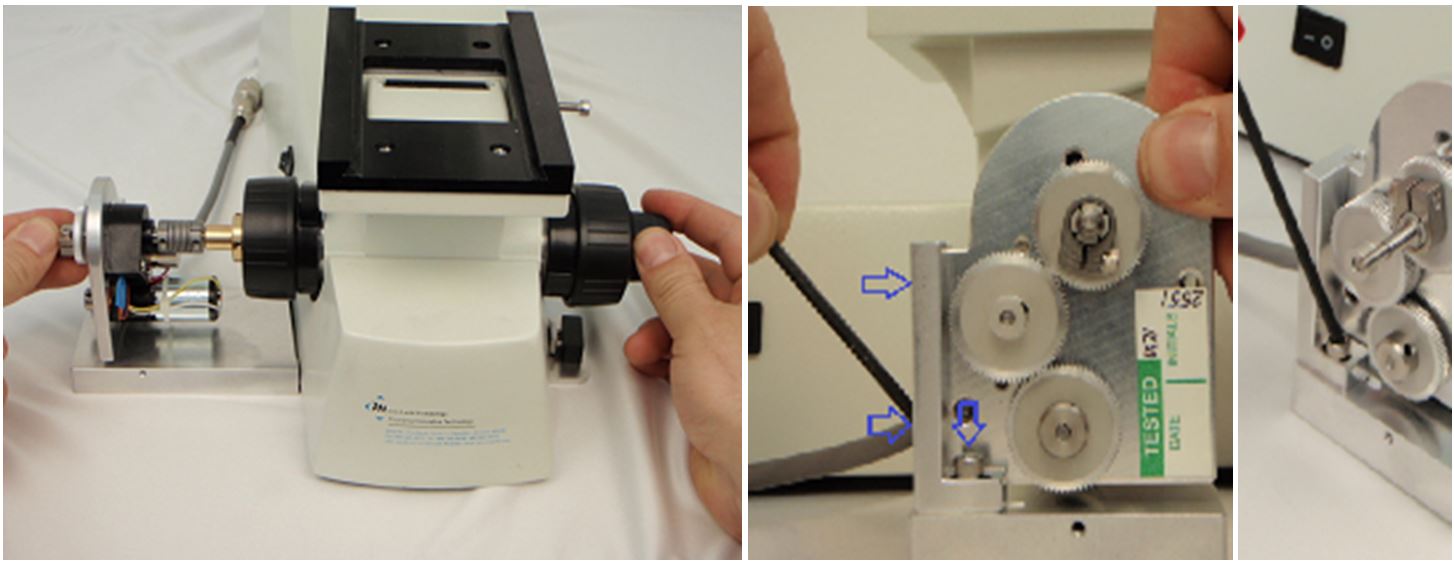
You will need to remove the left fine focus knob by holding the course and fine focus knobs on the right and unscrewing the left hand fine focus knobs. BE CAREFUL not to allow the right hand knobs to pull out from the microscope – they must stay firmly pressed in at all times. Once the knob is removed locate the plastic washer – if it is loose attach it to the brass knob (there should be a sticky lubricant on the washer). Finally, while holding both right knobs firmly in the microscope, screw the brass adapter onto the fine focus shaft till the plastic washer is firmly up against the wavey washer. Use a () hex wrench to tighten the two set screws on the brass adapter.

Install Base Plate
Make sure the extension arm is attached to the baseplate and that the three rubber pads are in place.

Slide the baseplate under the microscope till it stops in place roughly just under the focus knobs. The two rubber stops should be snug against the microscope.
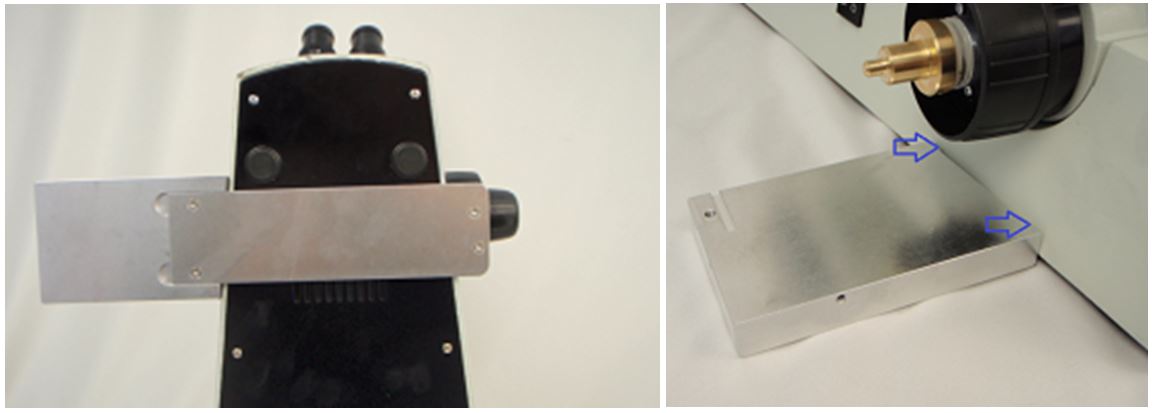
Use a 1.5mm hex wrench to tighten the clamp so that the base plate grips the microscope between the two rubber pads on the left and the clamp rubber stamp on the right. Note, you may have to loosen the clamp and adjust the baseplate position later when you attach the drive unit to the base plate.
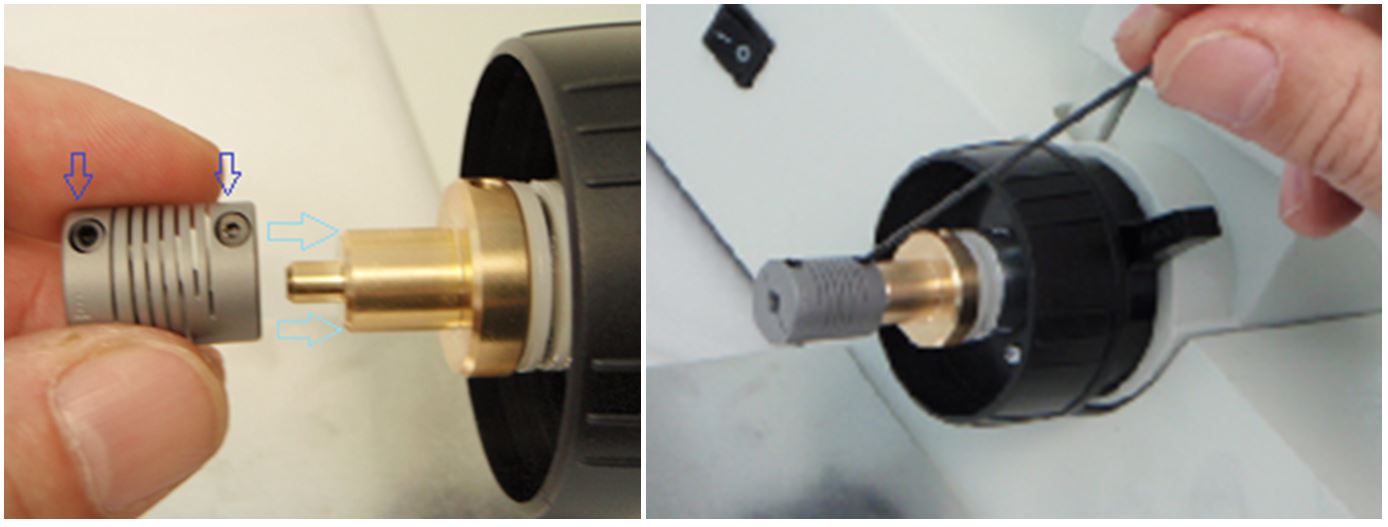
Install Flex Nut
Slide the flex nut on the brass adapter so that the tightening screws face forward. Tighten the right screw on the flex coupler enough to make it stay on the brass adapter post. Note: you may need to loosen and adjust this to get the flex coupler evenly on between the brass adapter and the z-drive shaft.
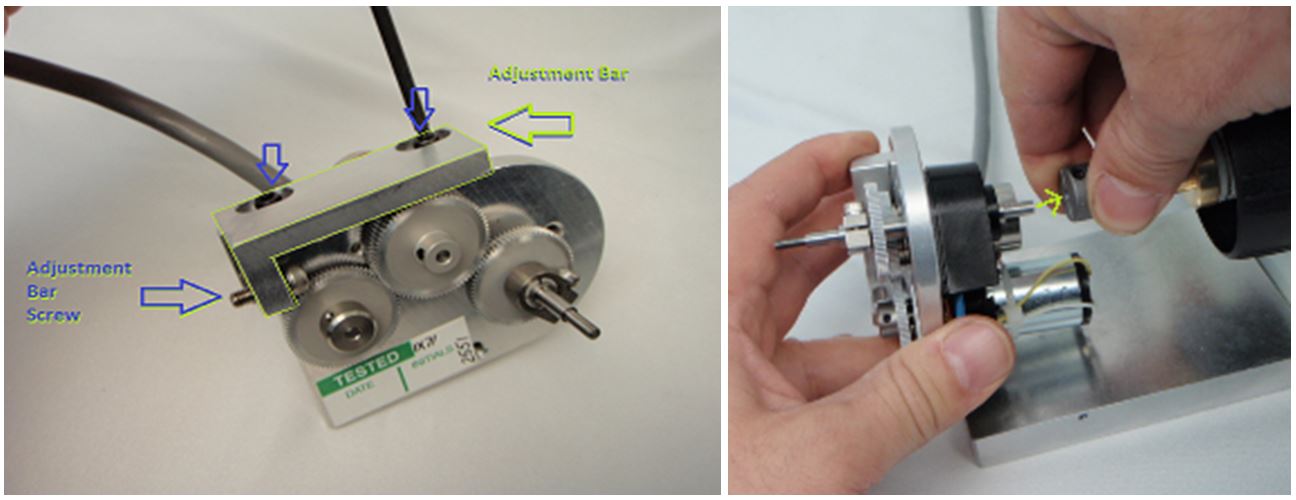
Install Drive
Loosen the two Vertical Adjustment screws on the side of the adjustment bar on the Z-Drive (attach to z-drive if shipped separately). If attached, remove the Adjustment Bar Screw and set aside. Slide Drive so the shaft goes into the flex coupler and the adjustment bar fits into the slot on the base plate. Note: It may be necessary to grab and bend the flex nut to an angle to get the drive shaft to go in the flex coupler hole.
Loosen the baseplate clamp and adjust the base plate so that the hole on the screw hole on the baseplate is in the center of the slot on the adjustment arm that the adjustment bar screw goes into. Tighten the baseplate clamp to secure the baseplate to the microscope. Install and lightly tighten the Adjustment bar screw.
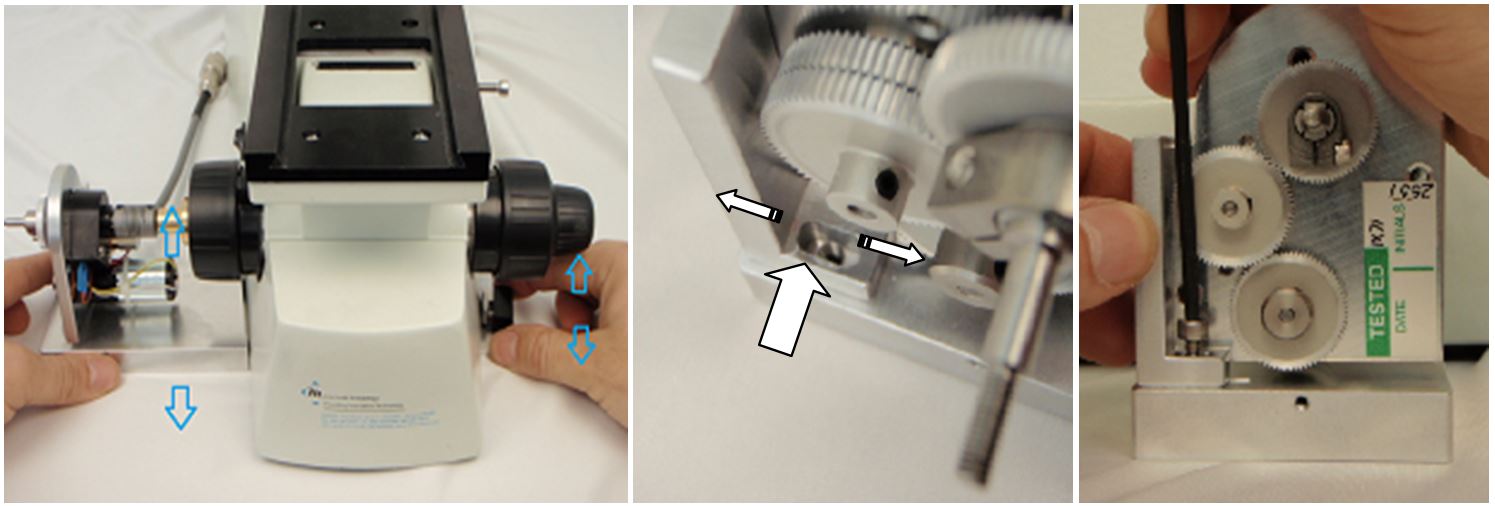
Align Drive
Loosen the two screws on the flex nut. Adjust the position of the nut till it is balanced between the brass adapter shaft and the drive shaft. Tighten the two screws so that the nut will not slip on either the brass adapter or drive shaft.

Ensure the three screws on the adjustment bar are slightly loose. Grabbing the and turning the knob on the right hand side of the microscope, adjust and align the position of the drive on the baseplate so that there is the least amount of friction. The flex coupler should stay straight and not flex when you are turning the knob. When the best alignment position is found, tighten all three screws on the adjustment bar. Ensure that the screws on the flex nut are tight enough that there is no slippage – all adjustment bar screws are tight – that when you turn the fine focus knob there is no friction from misalignment of the shafts and the flex nut.
Install Cover
Slide the Cover over the drive so that its holes align with the screw holes on the baseplate. Install the two cover screws and tighten with a 2mm hex wrench.
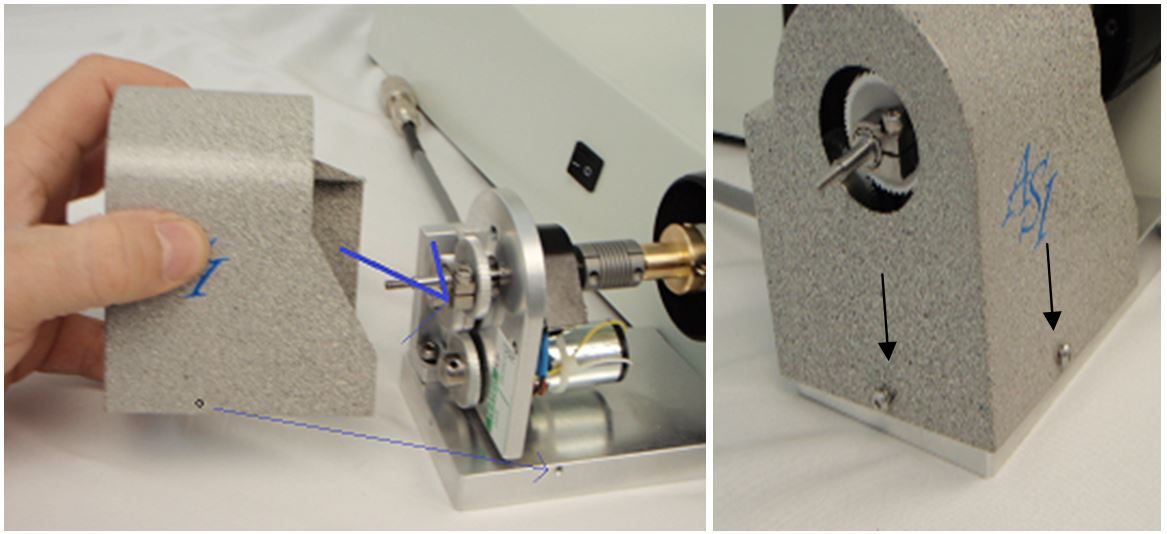
Install Knob
If you hear a rattle when shaking the knob. Take a hex wrench or screwdriver and gently push till the knob cap pops off releasing the lock nut that is trapped inside. (Note some knobs may not have a lock nut, if there is no rattle, just screw on the knob. While holding the fine focus knob on the right side of the microscope, slide the knob on to the drive shaft that is protruding from the cover and screw it on till it stops, or just short of it rubbing against the cover. Using a tool like needle nose pliers, screw on the lock nut (if you have one). Finally tap on the knob cap till its secure in place. The Z-Drive is installed!