Table of Contents
Zeiss Axioskop II Z-Axis Focus Controller Drive Installation Procedure
The procedure below outlines the steps necessary to install the ASI Microscope Focus Controller Drive onto the Zeiss Axioskop II microscope.
To perform the following steps you will need the following tools:
1.5mm, 3mm, 1/16”, 5/64”, and 7/64” inch Allen hex wrenches The hex wrenches are provided by ASI.
The procedure has four parts:
- Removing the left fine focus knob
- Installing the baseplate
- Installing and aligning the motor drive assembly
- Installing the motor drive cover plate and fine focus knob
Part 1 Removing the left Fine Focus Knob
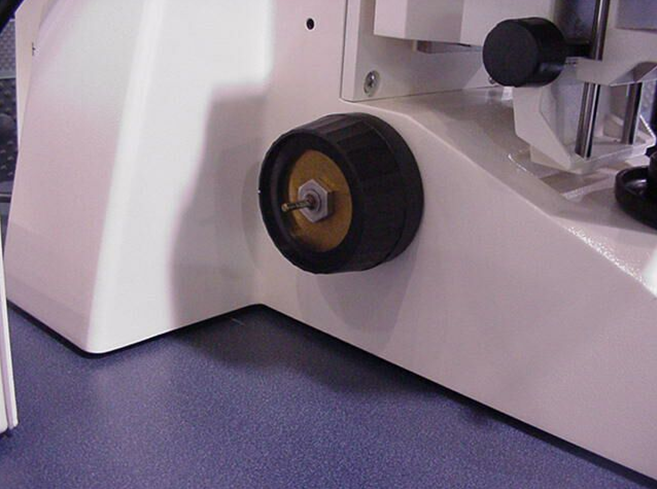
Remove the left fine focus knob from the microscope as follows:
- Use the 1.5 mm Allen wench to loosen setscrew.
- Pull knob straight off to expose shaft.
Part 2 Installing the Baseplate
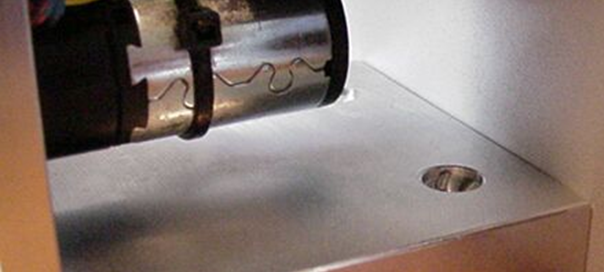
Locate the baseplate / drive assembly and remove the drive from the base plate, if it is attached, by removing the horizontal adjustment screw shown in figure 6. Lift the front of the microscope up and slide the baseplate under the microscope so that it is approximately centered under the left focus knob.

Part 3 Installing and Aligning the Motor Drive
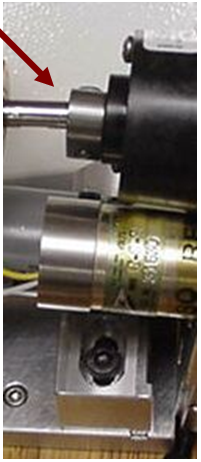
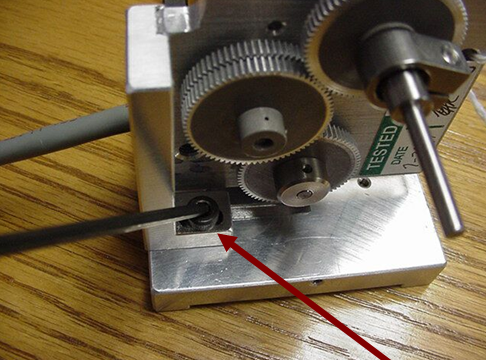
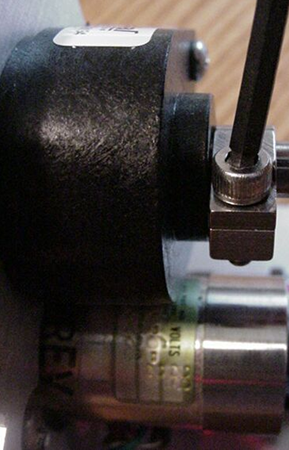
Locate the ASI motor drive. Install the drive by using the 7/64” Allen wrench to first loosen the clamp at the end of the ASI drive shaft. This clamp is located near the black encoder case and shown in figure 7. Also loosen, but do not remove, the two vertical adjustment screws located on the adjustment bar that is attached to the drive as shown in figure 4. After loosening the clamp and screws, slide the ASI drive shaft over the microscope’s fine focus shaft as shown in figure 5. Then slide the tab on the bottom of the horizontal adjustment bar into slot on the base plate. (Please Note: the baseplate may need to be moved to properly align the adjustment bar.) Use the 3mm horizontal adjustment screw removed in part 2 to secure the drive to the base plate as shown in figure 6 above. Leave the screw loose enough so that the horizontal adjustment bar can slide easily in the groove in the baseplate. Use the 7/64 inch hex wrench to tighten the drive shaft clamp, as shown in figure 7 below.
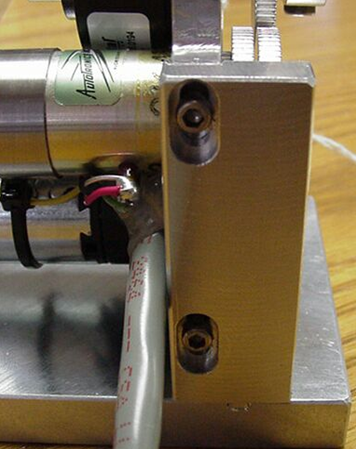
Slide the motor drive up and down, forward and backward slightly while turning the right fine focus knob until it is in the position where minimum drag is felt. Secure the motor drive into position by tightening the horizontal and vertical adjustment screws in figures 4 and 6 above.

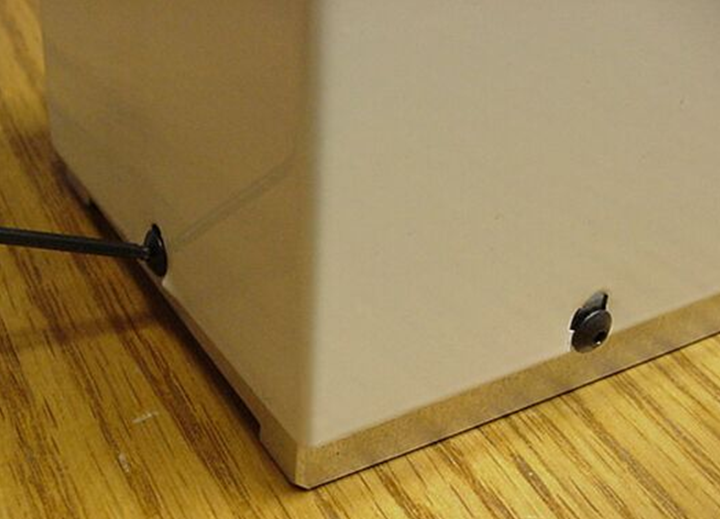
Use the 0.050” Allen wrench to tighten the baseplate clamp shown in figure 9 above. NOTE: The baseplate clamp should be positioned so that the force of the two set screws presses against an area that is between the switches as shown in figure 8 above.
DO NOT over tighten. Excessive force may cause the plastic cover to break.
Recheck the alignment by noting the amount of drag on the right fine focus knob. No noticeable drag should be felt. Repeat the steps above if necessary.
Part 4 Installing the motor drive cover plate & fine focus knob.
Locate the motor drive cover. Loosen the 4/40 button head screws from the drive with the 1/16 “ Allen wrench. Position the motor drive cover over the motor drive assembly and secure in place using the 4/40 button head screws.
Slide the microscope fine focus knob over the shaft extension and secure in place using the 1.5mm Allen wrench. Please note that the setscrew in the knob should mate with the flat surface on the shaft.
This completes the procedure for installing the ASI Z-Axis Focus Controller Drive on to the Zeiss Axioskop II Microscope.