Removing the RF(capacitor) modification
Between mid 2018 to mid 2019 a small capacitor was added to MS2000, RM2000 controllers to reduce RF emissions. When this capacitor fails it grounds the oscillator preventing the microcontroller from running. The controller doesn't respond to serial/usb input, joystick, knob and the LCD is blank or full of bars.
Fortunately removing the failed capacitor restores the controller function. This guide walks you thru on how to access the controller, find the capacitor and remove it.
Tools Needed
You will need the following tools to complete the repair:
- a medium Phillips/star screwdriver
- Soldering iron
Opening the controller
First, locate the tools needed to remove the board and a place where electrostatic danger is minimized, either an anti-static mat or a wood surface.
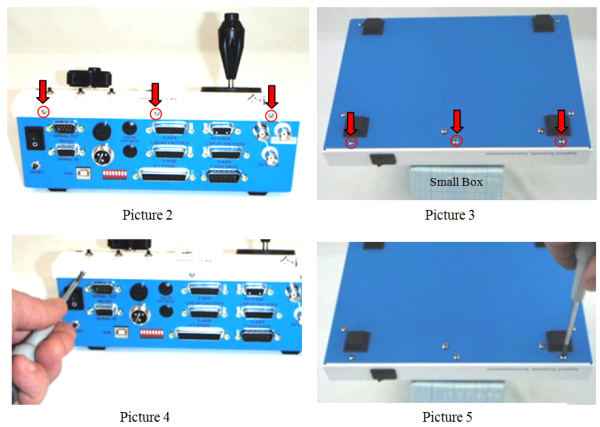
Second, using the Phillips screwdriver, remove the three upper screws that attach the top of the lid, see picture. Then turn the controller over on a small box or a piece of foam to protect the joystick and remove the three lower screws, see picture. Save the screws for reassembly.
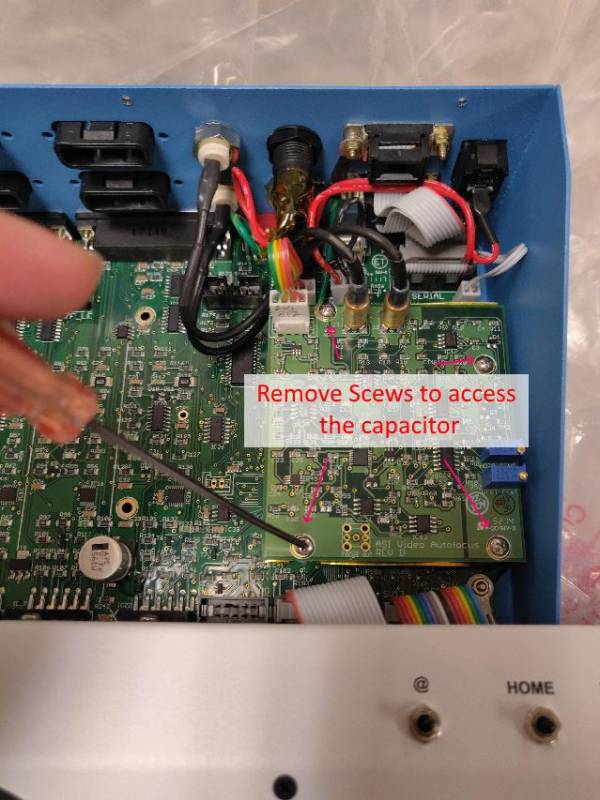
Some controllers might have an add-on card like the autofocus or crisp system blocking access to the capacitor. Unmount it by unscrewing the four screws holding it in place.
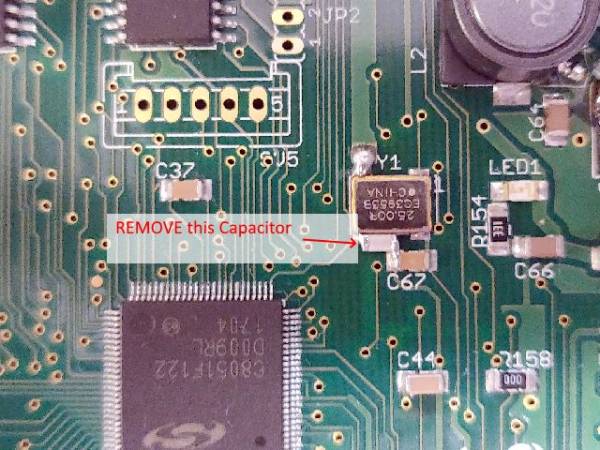
Then look for the oscillator Y1, next to it are two capacitors, one white and another mustard color. Remove the white capacitor (refer to the attached picture) with soldering iron, you may have to remove the mustard one as well.
Then power the controller and test it, if it doesn't work, put the mustard one back in and test it again.
If that didn't work either the board might be more damaged, contact ASI to arrange an RMA.
They are bypass caps, the system can work without them. But if they are broken, they short the voltage rails and prevent the system from booting. Hopefully, the power regulators onboard haven't failed.


